


Hello, everyone. My name is Ivo and welcome to Cooking with the Coias. If you're tuning in for the first time, feel free to subscribe. We have got a great family of subscribers and today, folks, I'm so glad you joined me because I'm going to share with you how I make my homemade pasta. Making homemade pasta, folks, is so easy. It's quick, it's simple. And most importantly, it's a lot of fun. Let's get started right now. So let's start by talking ingredients. The first ingredient you're going to need is flour. And I'm going to talk today about the three most common popular flours to use when making pasta.
First of all, all purpose flour. Very good choice. All purpose flour makes a great pasta dough. And yes, I have a lot of flour. We're not making all this today. I typically take that flour and put it into another container. But yes, I go through a lot of flour, but all purpose flour, a great choice for homemade pasta. The second choice, these are not in any order, by the way. The second choice would be a00 flour. Double zero flour is typically used for pizza making. However, it also makes a very good pasta dough. The pasta dough with the double zero flour is smoother silkier more delicate, let's say. And then the third option is actual pasta flour.
The difference with pasta flour is it's actually a blend of all purpose flour and semolina flour. So it gives you that nice blend and makes for a real nice homemade pasta. So again, any one of these three great choices, okay, today I'm going to use the pasta flour because I have it and B, because I do like it a little better. So that's the flour. Next, you're going to need a little bit of extra virgin olive oil, try to get a very good extra virgin olive oil because you're adding it right into your dough. So you want one of good quality and good flavor. Of course, you're going to need a little bit of salt. And as far as the salt goes, table salt is good, sea salt is good as well. Just whatever salt you use, make sure you use a fine salt.
You don't want those big crystals in your dough. You want a fine salt. So a fine sea salt or a table salt? Perfect. Lastly, the fourth ingredient is you're going to want to use large eggs. So those are the four ingredients that you need to make pasta very simple. You probably have those ingredients right now at home. So how much quantity of ingredients do we need? Very, very simple formula, easy to remember. So for every person per person, you need one egg per person, you need 100 grams of flour per person. You need one teaspoon of extra virgin olive oil per person and a quarter teaspoon of salt per person. That's it. So today I'm cooking for Laura and I. Two people, two eggs, 200 grams of flour, two teaspoons of extra virgin olive oil and a half teaspoon of salt. That's it. So now that we know the ingredients, we know the quantity. Let's take a minute and talk about tools of the trade.
So regarding tools, we're going to talk about three different variations. We're going to keep it simple, folks. And speaking of keeping it simple, all you really need is a rolling pin. That's it. If you have a roller pin, you can make homemade pasta and a knife. It's as simple as rolling out your pasta dough, getting it to the thickness you want, and then with your knife, you cut your pasta. And honestly, my mother made pasta like that for years, and she would take that knife and she'd cut that pasta, make spaghetti, fettuccine whatever, and cut so fast. I could never believe how she did it. I don't do that.
But you definitely that's all you really need to make homemade pasta if you want to have a little bit of fun. When I was in Italy, I bought these tools here. If you take a look at them, this one here makes fettuccine. This makes spaghetti. So same principle. You roll out your pasta dough to the thickness that you want and then quite simple, you take these and you roll it over top. And this cuts the dough to the pasta that you want in this case, fettuccine or spaghetti. So that's the second option. Probably the most common option is this machine right here. So a little hand-crank pasta machine. I've had this probably for almost 40 years now. My parents gave it to me just as I got married and have been using it ever since. They come in different colors, but they're basically the same. And if you don't want a hand-crank, you could also. Get a motor attachment to this particular part of the machine and you don't even have to hand-crank. Speaking of not hanging, cranking, the other option is I also have a KitchenAid and KitchenAid has a pasta attachment.
Again, you could attach it to your KitchenAid and you don't have to do any cranking. You just push a button and you're making pasta. So very simple tools. We know the tools. We know the ingredients. We have everything. Let's make pasta. So let's start off by weighing our flour. So, like I said, there's two of us tonight for dinner, so we're going to go with 200 grams of flour. Okay. Oops. 205. Let's just take a little bit. Oh, honestly, you don't really even need to be that exact. I mean, if you think about I mentioned how my mother made pasta, she never measured anything. You know, so much flour, so many eggs, you know, old school. All right. So there's 200 grams of flour. I'm just going to put it into a larger bowl. In my other bowl, I'm going to take my two eggs. You, Adelaide. My two eggs into the ball. Again, it's one egg per person. Two eggs and two my eggs. I would like to add my extra virgin olive oil.
So again, two teaspoons. One. To. Now just mix the olive oil and the egg together. Okay, that's now done. I can remove our weight scale. All righty. Now to our flour. We're going to add the salt directly into the flour before we mix the egg. So let's take a half teaspoon of salt added in with our flour. And same thing. You're going to want to just mix that salt and flour together. Okay. And when you do so, you can leave a little well in the middle. Okay. Now we're going to take our egg and pour it into that oil that we made. And I'm going to take all that and go with the spatula. Love using the spatula. Okay. There we go. And now, quite simply, begin mixing. Now, you could do this on the counter as well.
I like to use a bowl and keep the keeps everything contained within the bowl. I don't have to worry about spillage or anything like that. It's just for me. I find it easy. But by all means, you can do this straight on the counter. So you want to just add flour a little at a time and work it into the egg mixture? Now, having said that, I'm using a spatula, but I'm going to have to get in there with my hands at some point soon. Just try to get as much incorporated as you can. Basically, you want to get that that flour all incorporated in with the egg, and then we're going to begin to need it into a dough ball. All right. I think it's time. Time to get my hands.
Into the mix. And of course, the hands are 100% clean. The chef always has the cleanest hands in the house. That's a given. Okay, so let's just get this all coming together. To keep mixing it. Incorporating the flour. And then it's going to start to come together as a dough. You can start to need it, blend it, form it. Okay. Little by little, making such a small amount today, and it's hard to believe that 100 grams of flour will feed one person, but that's the ratio. Now, that's also generally speaking, if you have some very hungry people who like to eat a lot more, then you could always bump up to 150 grams per person. But honestly, 100 grams per person, as a general rule works very, very well. Okay. So now that we have somewhat of a dough starting to be shaped, we need to need this and to need it.
I want to get all this off my fingers as well. A little bit of stickiness there. Okay. So you don't you don't need this like you need bread with the folds. This you actually have to push down. I like to use the palm of my hand and you kind of push push it down and out, down and out, fold it over, down and out. So keep keep pushing down with your palm and continue to need this until it becomes a nice, soft, pliable dough. You will be able to tell because you can see here all the ingredients are not all incorporated. I see. You know, there's still flour here and there's little bumps and stuff all over. You want a nice, smooth, all incorporated dough. So I'm going to continue to need this. It's probably going to take me about 5 minutes to continue doing this. Ten at the most, but typically 5 minutes will do it. And again, you just leaning into it and pushing down with your palm. So you just push like that in roll, push in roll. If you want to fold over, push and roll for that push and roll.
And what you're doing there is you're blending all the ingredients and you're making a nice, soft, pliable dough. I just want to show you, it's been about 2 minutes and you can see it's already smoothing, though, and it's starting to become a nice dough already. But don't stop at that point. Keep going, like I say, at least for 5 minutes, because it's going to continue to get softer and much nicer with a little more kneading. Okay. So it's been a good 5 minutes and I can tell just by the feel this dough feels so much better, softer, smoother, silkier. It's it's done. That dough is now done. Absolutely perfect. Okay. So all we do at this point, very simply, we've done our part. Now the dough has to do its part. It likes a little rest. I'm just going to cover it a bit with flour, take a towel and we're going to cover this for 30 minutes.
It needs to sit and relax, rehydrate and get ready to be turned into. We're going to make fettuccine today. So while this is sitting, I'm going to fire up the stove and get the water starting to boil. We're going to multitask. Okay. It's been a half hour. Our dose been resting nicely. It gave me an opportunity to clean up as well, which is really good. And if I didn't mention it earlier regarding the dough with the extra virgin olive oil, adding that extra virgin olive oil into the dough makes it smoother silkier and adds great flavor.
That's the most important part. Okay, so what we're going to do, I'm going to use the old hand-crank pasta. You probably figured that out already. This is my favorite way to make pasta, and it's fun. So what we're going to do is cut this up into slices and pass it through the machine. Now I want to show you this. We're going to pass through the roller first and roll out our dough. This particular roller has seven settings, and every time you turn the setting, you start at the largest setting, which is the widest opening. And then you slowly make your way down to the thinner one or the thinnest one, depending on how thick you want it.
But I want to show you these rollers. I'll show you what I mean. Actually, there are six settings and here are the rollers here to see how thick that is or just watch as they turn. You can see how it got smaller. There's the larger, smaller. So that's the largest opening. That's the smallest opening. And you want to always start with the largest opening. And I'll explain to you why. Cut a piece. Now, remember, the thicker and the bigger the pieces that you start with, you're going to have a bigger, longer pasta noodle. So you want to cut these not too thick, not too thin. So I'm going to start off with a chunk about that big and I'm going to put it through the largest setting. And quite simply, you just put it through and with your other hand, just kind of as it comes out and there you have it.
Now, what I also want to say is so this is rather thick. If you forget and you're on the last setting and you put it through, I'm just going to show you what happens. Okay. So if you forgot and you're on your last setting and you take your your pasta dough and you try to feed it through the last setting, it's going to feed through, but it's not going to be happy.
In fact, it's not going to be happy at all. As you can see here, it's just really tearing the dough. That is not what you want to do. You want to avoid that at all costs. So I'm just going to reshape that and we're going to we're going to repair that. So start off with the largest setting, pass it through. Now, you see, I have a shape about that wide. If you want it wider, you can simply fold your dough and put it through again. Again, still through the largest setting. Okay. And you can see the shape that you're getting. You can continue to fold it until you get the shape that you want coming out. Okay. And maybe one more time that way you don't have to do this. But I like to get a nice rectangular shape when I'm first starting out. Okay, so I'm going to pass it through three times. Yeah. There we go.
Okay. And now we're going to go to the next setting, pass it through. And each time we pass it through, it gets a little thinner and a little longer pass through for the next session. Now, you see how easily this is passing through. If for some reason your dough is sticking to your rollers, then quite then quite simply, just add a little bit of flour to your dough and then put it through. Let's go to the next setting and you keep going, setting by setting until you get the thickness slips, until you get the thickness that you want.
Again, it's, it's, it's flowing through the machine very nicely. So I do not need to add any flour. If it were sticking, I definitely would. Okay. And then one more setting. Let's see what we have here. So again, if you want it thin, you go to the last setting. If you want it a little thicker, you can stay away and go to the prior settings. So as you can see, that's pretty thin and pretty long. I actually do not want it that thin and that long, so I'm just going to fold it in half and I'm going to go to the second last setting.
That's the one that I really wanted, but I wanted to show you the length and the thinness that you get. Okay, so I'm going to pass it through one more time because I. I gave it a fold over. There we go. So I'm going to lose that handle yet. So that's how long our pasta noodles are going to be. Take a little bit of flour and let's put some flour into a cookie sheet and just place it on the cookie sheet. A little bit of flour on top in case we have the stack. We don't want anything sticking. Okay, so let's continue now and let's repair this one. Now, we have to remember to go back to our first setting. Back to the first setting. All right. So let me finish this. It looks like two more pieces here. Let's get this finished. And there's our last one is the small piece and put that through and there we have it.
Okay. This one's a little smaller and shorter. If I wanted that to be a longer noodle, all I would have to do was fold that in half, and then it would be thinner and longer. But you know what? That's okay, too. All right, now let's make fettuccine. So for the fettuccine, we're going to use that ruler there and very, very simple. Take your pasta, feed it in its change the handle. Okay, feed the pasta through. And as it goes through with your hand, you can catch the noodles there you have beautiful.
Isn't that beautiful? Beautiful fettuccine, right? There. Linguine, fettuccine you, make what you wish. Okay. A little bit of flour and then there it goes. So again, now we're going to take our next piece, shake off some of that excess flour. Again, we're going to feed that through. And you can kind of catch it as it comes through the other side here. You can see it as it comes through. Hey, isn't that nice? That beautiful, beautiful, beautiful, homemade pasta right there. And then just kind of fluff it up a bit. A little bit of flour. We don't want to stick. Okay. And let's past the next again. If you have children at home. Get them to help. Maybe they can catch the pasta as it comes through.
Right. Anything to get them involved. Okay. And feed that through and catch the pasta. There we go. It cuts it really nicely. It's a perfect noodle right there. I like the thickness. I like the length. I like the look. Beautiful. A little bit of flour. Spread it around a bit. There you go. Next piece. How simple is that, folks? How simple is that? Okay. Catch you down here. There we go. Spread around a little bit too far. Okay. And our last piece. Same thing.
Just get it started. Feed it through. For you. Their beautiful, beautiful homemade pasta made with the most important ingredient. A little TLC. Little tender, loving care goes a long way. Okay, that's it. Our pasta is now ready. We have some choices here, too, folks. What we could do. Our pasta is ready to be cooked. But let's say you made a little more than you wanted and you wanted to save a little pasta. It's no problem. You could dry this pasta. Just add a little bit more flour. Okay? And you could actually leave it right in this tray if you want. Move it around every hour.
Walk by, give it a little shake. And within 24 hours, 48 hours, this will be dry. That's one method. The the best method is to put it on a pasta tree and hang it. You hang it like you would laundry. You know, you hang it and you let it dry individually like that. But if you don't have a pasta tree, quite simply, you can leave it in your tray, space it on as much as you can. In fact, you can spread this out into two trays to make more air and just spread it around with lots of flour.
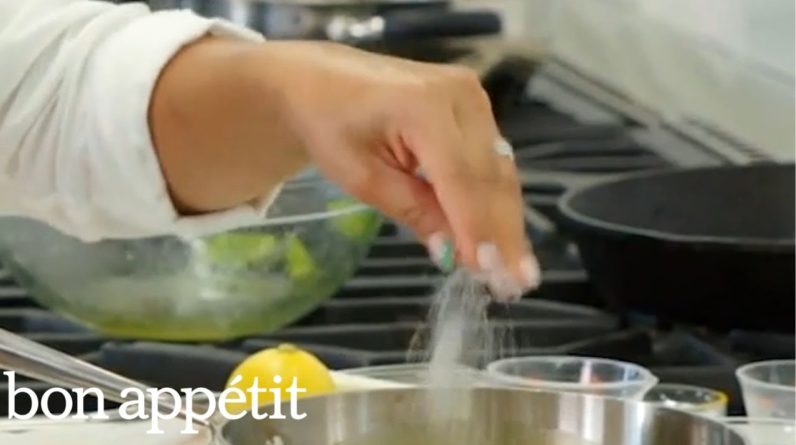
It will dry up and then just put it in an airtight container and seal it and you're good to go. Or you can freeze it. Okay. But right now, this is going to get cooked because that, folks, is my dinner for tonight. Let's bring it over to the stove. We have a nice boil going here in to our water. Even though we added salt to our pasta, do we still want to add salt to our water? And you want it salty like the ocean? Yes. That means three quarter teaspoon or three quarters of a tablespoon of salt for every liter of water. Okay. Get your water nice and salted. Time to add our pasta. So quite simply for the pasta, try to shake off some of the flour and then just begin adding your pasta noodles into your water a little at a time.
You could see as you add your pasta noodles, the water stops boiling because we're cooling the temperature down. And that's okay because it's going to come right back up relatively quickly because we're not cooking a whole lot of pasta today. And there's the last of it. There we go. All right. So with our pasta in, we now basically want to bring this back up to a boil.
So give it a little stir. Look at this beautiful look at these beautiful noodles, folks. Oh, my goodness. Homemade. It doesn't get much better than this. Okay. Give it a little stir. Put the lid back on. Let's bring it up to a boil. Now, remember, homemade pasta cooks much, much quicker than store bought dried pasta. So typically about half the amount of time. So we're going to bring this to a boil. And after about 4 minutes, we're going to taste it because it could be done in 4 minutes. It could be in 5 minutes, 6 minutes. But typically in 4 minutes, it's usually done. So I'm going to suggest start testing your pasta at the four minute mark. But after it comes back to a boil so you can see it's starting to come to a boil now.
Okay. So I'm going to get the timer started. I get the timer started right now, and I'm going to keep the lid off because I don't want this to boil over. So 4 minutes. So I also have a sauce on the go here. I just made a simple sauce. If you're interested, I have got some beautiful sauce recipes. I'll put some links there. And for you, you can check them out. But this is going to be our sauce for tonight. Beautiful. And it's been 4 minutes. So let's check our our noodles and see if they're cooked. Now, remember, I made them a little bit thicker, so it might need more than 4 minutes.
We'll see. Hmm. In fact, maybe just another 20 seconds. It's basically cooked. So 4 minutes did it. But I'm going to give it just a little bit more. It's just maybe too slightly authentic for Laura. We'll cook it just a tad bit more. Okay, that's definitely enough. I don't need the taste. So, of course, the stove. Let me get this poured out. And we're going to strain this water right now. And when you do this, you want to strain as much water as you possibly can out of the pasta, because otherwise your sauce will be a little more runny and less thick.
So there we go. All those beautiful pasta noodles. Isn't that quite nice? Okay. And looking in there, I think we're pretty good. So sauce can go off. Let's get that plated. And you know what next, folks? My favorite part, the taste test. One of my Sunday dinner favorites right here, folks. Home made pasta, homemade sauce, homemade meatballs. That's just like I said earlier. Homemade. Goodness. Absolutely delicious. Okay. The taste test.
All righty. Just get a little bit of that sauce, a little bit of that cheese, a noodle or two. Hmm. Hmm. Mm hmm. Folks. Absolutely delicious. You saw how easy that was to come together. Just a few simple ingredients. There is no need to go out and buy homemade pasta. You could be eating homemade pasta within an hour. Start to finish. Done. And if you don't have tomato sauce ready to go, just heat up a little bit of butter or some olive oil and some garlic. Toss it together. You still got an amazing dish. Homemade pasta, folks. If you haven't yet, give it a try.
It really, really is delicious. I want to thank you, as always, for spending time with me in the kitchen. And I hope you spend time in the kitchen soon and have some fun as well. Thanks for tuning in. Until next time. Bon appétit. Oh, yeah. Time to plate this. Give Laura a call, split up these meatballs and have ourselves a great dinner and a glass of wine to..