

hey guys welcome back to home built and in this episode we are going to reassemble
the our Ferrari and flow coat it all right guys well I just want to take a quick
second out to thank today's video sponsor uh I know I don't do them all the time but these guys
are really helping the channel out and they have something that I think you guys and myself will
find very useful and that is a jump starter pack now I have been using jump starters for quite
a while I have this massive lump that I have to carry around all the time it is really heavy
a really awkward and particularly with old cars they're black batteries going flat all the time
and they're not always on charge you forget to charge them and they don't get used that much
and I get stuck in the middle of nowhere so I always try and have some sort of jump starter
with me but it takes up a lot of space it clunks around and that's where there's topped on
Chargers actually fantastic this little thing is almost twice as powerful as my big lump that I've
been carrying around comes in a small convenient pack that's easy to Chuck in the car I've got
an example right here the rockster which always needs jump starting because the battery
is dead so uh let's show you how it works so this one little unit can jump start up to eight
liter petrol engines and six liter diesel engines it can also do up to 25 jump starts
on a full charge this also has a light it has a flashing function and it also has an
SOS flash which hopefully you never need that one but uh it has it and it can do it so the
rockster has been a real pain owning and uh yeah every time I try and crank it yeah there's
nothing this is simple and convenient it's also got a built-in surge protector so if you get the
polarity wrong which you should always check but if you do it will cut out and uh we'll save your
car and the battery so uh I'll just connect it up and let's give it another try foreign like butter that works great so quick and easy
much less messing around than the big The Big Unit so along with being just a jump starter it
also has some USB ports in the end so you can plug in a phone or use it to plug in something
like a air compressor to pump up some tires it's quite a universally handy bit of Kit to go
in the car particularly those of us with old cars that aren't always the most reliable this will
definitely be coming with me in Harry wherever I go so so check them out I'll put a link in
the description and let's get back to the build all right guys welcome back and those who've
been watching will have seen last week that on the our Ferrari I painted a whole bunch of bits
and pieces of the car most importantly all the hinges and bolts and things like that so I could
start reassembly so that I can do the final flow coat on the car um there were lots of comments
about that so let's move back into the booth and I just want to cover some of the uh the most
common things that were kept being said all right so one of the things that I did paint last week
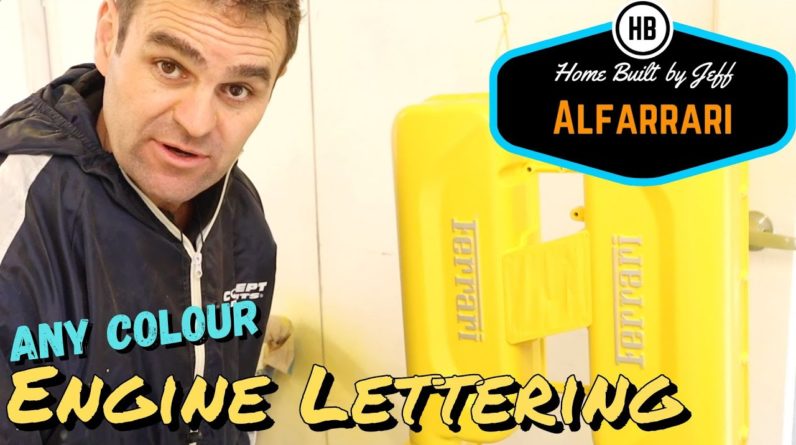
was this which was the plenum for the Ferrari engine and there was lots of discussion about the
Ferrari lettering one of the main ones that people kept saying is why didn't I just paint it yellow
and then sand back the face so that the polish aluminum would show through and the reason I
didn't do that there's a couple of reasons really is uh for one you will actually you would see the
primer you'd get a little Halo all the way around all the letters of the primer first and also the
polished aluminum would not match the silver of the rest of the car and one of the things that
I I chose and the reason why I went the silver lettering I did consider doing black lettering
for example the reason I chose silver is mostly to match in with the subtle stripes on the car subtle
in inverted commas lots of people were suggest that they're too subtle and they could do with
a black pinstripe around the edge or something like that and that's not what I was going for if
you have a look at how I've done the stripes on how Harry my 911 the outer stripes are actually in
the highlight color of the purple and the inside is black just to give that differentiation I
could have done the outer stripes in black or done a pinstripe or whatever uh on this but that's
the way I like it I like that they're they're on there but they're not as in your face as they
could be if they were black or if they were trucker laurae or whatever um so yeah so that's my
thoughts and the reason is this silver is going to match in the colors are going to match in with the
stripes but it will still stand out because you're going to see this from the outside of the car
through the Bonnet window and I think that's uh the way I like it as for other comments um there
were lots of comments about these torsion bars that I painted these and uh because they twist
the paint is going to crack and that is possible the paint is thin and it is reasonably flexible so
we'll see how it stands up it was painted before um but ultimately this part is all completely
covered the only bit you see is this bit here this is going to be coming up and touching
the Bonnet and this bit doesn't twist this pit will more than likely keep its paint on it
it's just this portion of the uh the torsion bar that the actual torsion part it's covered
up it's got a I've built the uh the cover that goes over it so you're not going to see it
anyway so I'm not too concerned about that thing I need to do now is start reassembling the
car so putting the Bonnet and the boot on and the doors and one thing that I did mess up with
the door hinges is there are obviously left and right side door hinges which I had written on
uh with marker and I painted over that didn't I and I've got my little alignment holes on
them and I don't know which one's which so I'm just going to have to guess and see if
I can get the right one and hopefully they're different enough that it stands out and I can
imagine line them up so let's see how that goes foreign a silly amount of time wrestling
around with this door trying to get it to a line perfectly and then I actually realized
that I don't have the rubbers into anyway and I'm not putting the rubbers in it for now
so of course this is sitting in a little bit and it's not quite perfect it's pretty
good but uh it's not as perfect as I wanted and it doesn't really matter because I've got
to put the rubbers and stuff in later anyway so after a bit of playing around all the panels are
back on the car and it's actually starting to look like a complete car again so now it's time for
my favorite part which is sanding what I'm doing now is I'm going to be going over the whole car in
800 grit and with the sanding I need to pay close attention to these bits where I blended in the
uh a repair so here I repainted the yellow and then blew in and you can see there's a gloss
difference here uh between where I'd sanded previously and where I'd re-cleared so I need
to get rid of this the step Edge on here also up around the roof and also I want to get rid of any
uh step on the stripes they're pretty good already because I just laid the clear on heavily here
so it shouldn't take too much but it's time to be very careful and sand out these edges so that
we can get ready to fly coat the car yay sanding all right well that was an entire day pretty
much of sanding trying to get this thing back to 800 grit nice and flat getting rid of any of the
transitions so places where I didn't do the clear coat uh over the whole thing so where I didn't
want to respray the entire car there were some of my soft Edge masks on the front of the Bonnet
up here on the a-pillars and the B pillars just so I didn't have to re clear all these bits so
I I can clear it again later and when I rubbed it back there are a few rub throughs and a couple
of Errors so I'll take you through now and just show you a couple little spots where I mess it
up but I might just give it a quick clean up again first just uh wipe off all of this white
residue so you can see what I'm talking about okay so I'm going to take you around now and
show you some of the bits where I stuffed up so I did show you earlier that there were issues
you can't even really see it the way I've sanded it back here but there were some issues with
some uh places on the Bonnet here where the paint reacted and uh and sort of was a little
bit messed up so I'm going to just blow that in uh before I flow coat it I knew that was going
to be the case uh coming over here where I did my repair you can actually see a line I don't
know how much the camera is going to pick it up so you can sort of see there's a line there
that is actually you can't feel it but that's actually where the yellow where I didn't blend
it out well enough and and also a couple of rub throughs again it's rubbing through the yellow
but there's clear and more yellow underneath so so basically I'll just uh blow that in
lightly and touch it up and it should be fine uh other places that I messed up I rubbed through
over here I actually damaged the door when I was putting it onto the car and uh and made a little
Dent here and rubbed it out so again I can blow that in the only other place I can think of is
on the back here I run through a little bit of the silver so again I'll just blow these bits
in and it won't be a big drama so one of the reasons I was going to flow coat the car anyway
was because I knew I would have messed things up in the uh these these stages and it's just what
I do I mess it up but uh they're all fixable it's just paint and that's one thing to always remember
now the the reason for flow Coating in the first place is often you have a lot of build up all the
way through the uh the process of your paints and any sort of inconsistencies can just sort of
get there from all of the color and all of the uh the clear coat so it's it's nice to be able
to sand it back get rid of the edges from things like these Stripes get that stuff out of the way
and then when you flow coat it it will just it basically means just just flow on the paint get a
nice good flat glossy uh final coat only a couple of coats are clear I'm not going to go to town on
multiple coats because obviously it's already got um a few cloaks of clear on it already so it's
just laying that clear on to get that nice glassy finish and then it makes the uh the last final
bit of buffing and everything nice and easy and in my case it gives me a chance to
go through and fix all my mistakes but that's looking pretty good now so uh let's
head back over to that Ferrari plenum foreign guys we can see that I have now sanded back
the Ferrari plenum and you might be wondering why I went to all the trouble of painting
silver and then sent it back but there is method to my madness so we're going to get
everything in the booth now we're going to start masking the car up getting everything
masked up ready to go so that we can get everything finalized finish paint and hopefully
it's all neat and tidy the way we want it foreign we're all masked up I've wet the floor
I've cleaned I've cleaned again I've tack ragged once I'm gonna go around
now and everywhere I need to touch up I'm just going to leave a little bit
of tape so that I know where all the little touch tops are and I can go
around and not miss anything I hope I've just gone over the car and checked all of the
little spots and there's lots of little touch-ups that I need to do and it's actually getting late
it's the last day I've got before I need to post this video and I feel like I'm about to rush it
and I don't want to rush it because it's just gonna make a mess so I think I've got it in a good
position to leave it and continue on this bit next week what I will do today is I'm going to cover
this up and I'm going to do that Ferrari plenum and let's at least get something done this video
but uh I know I've shown you basically nothing because I've just been sanding and uh masking and
sort of doing stuff you've seen many many times so let's at least do something interesting
and get this throw up when I'm done foreign okay so now we are really coming to the reason
why I painted this whole thing silver first and then I've gone over it in the yellow after like a
lot of you mentioned I could have sanded this back and got the plain aluminum polished up and been
showing the Ferrari that way I wanted it to match the silver properly so it is the silver the same
silver as the stripes so it matches in and it's all nice and neat and you can use this method
on basically any sort of raised lettering I've got my raised lettering I know underneath there
is the silver so what I'm going to get now is a nice clean Rag and just some thinners the thinnest
is not going to hurt the clear coat underneath so that's why I did the silver and then clear coated
it so now I just got a rag pull tight at my finger and I'm going to very carefully wipe this off
that would have been easier if this was actually sitting flat but because I have to paint the back
of it as well it's hanging which is going to add a level of difficulty but let's see if I can very
neatly wipe off the uh the yellow over the Ferrari leave a nice clean silver and then hopefully
we can clear it and it'll all look fantastic in fact I'm going to take it down
lie it flat and then stick it back up again afterwards because it's too hard
while it's rocking around everywhere foreign so there we have it we have the perfect
Ferrari logo in the silver that matches the car and you can use this method if I
wanted to paint them black or any other color so I really like this method it's a
nice neat clean way of getting the exact finish you want so now it's just a matter
of clearing it and uh she should be all good all right and that is looking fantastic I do have
a tiny little run here that I can just uh get rid of later but it's looking really good I've got the
Ferrari that matches um I know a lot of you are going to ask why I didn't uh grind off the welds
on here and that's mostly because on aluminum particularly uh growing back the worlds will
make it really weak and if these things snap off we get runaway throttle and the engine is going
to rev and rev and rev until it blows up so so we don't want that to happen and uh that so these
need to be uh left and look I I don't think they're a big issue it shows my my uh welding or
lack of it but uh I think they look fine so I'm going to leave them like that uh I like the fact
that they're nice and glossy I didn't particularly want the wrinkle yellow I probably could have
done them in the wrinkle yellow but just trying to match it all in it just didn't work I did the
wrinkle effect on my Datsun 240Z that I had and uh you can go back I'll put a link up and you can
see that video but I'm really happy with this so all right I think that means it's
time for fun facts with Mrs Jeff hey guys after eight years of production of the
308 Ferrari replaced it with the three two eight now essentially the 328 was a facelift of the
308 so the main difference being an upgrade to a 3.2 liter V8 engine hence the name three two
eight an initial prototype of the 328 was built as a convertible but Ferrari feared it would
hurt the sale of the Mondial convertible so it never actually went into production as such only
a grand tourism Berlinetta or GTB hardtop and a Gran Turismo spider or GTS Target top were built
the GTS version was by far the most popular with almost five to one produced compared to the GTB
version a 328 GTB and GTS turbo were produced for the Italian market using a 2-liter intercooled
turbo engine the main noticeable difference is the lower [ __ ] ducts which feed air to the
intercoolers the turbo had 254 horsepower and could have produced much more but Ferrari
didn't want it to outperform the naturally aspirated 328 the 328 is still considered one of
the most functional and reliable classic Ferraris all right well uh at least I got the plenum
painted today and uh and I really love it in the yellow in the shiny yellow it's not the
wrinkle but uh I really like it in that that finish uh I am glad I stopped on the car I
was getting tired and I would have rushed it and it would have been terrible I would
have had to do it again anyway so I saved myself Time by not rushing so the wisdom that
comes with age young grasshopper something like that yeah so I'm glad I'm glad I stopped and
didn't just rush it so uh uh it's a good good point if you're getting tired just better
to stop and then create more work for later anyway all right like And subscribe let Jeff
know what you think and um around the colors of the Swedish flag today yes yeah the yellow the
blue my favorite colors um if you want to follow Jeffrey day earlier and then everybody else with
no ads yes and um hope everyone as well and happy happy car times and we'll see you on the next one
all right guys bye guys see ya now essentially the 328 was just a facelift of the 308 but with
an increased main difference being an upgrade excellent thank you and the Gran Turismo spider GT s ometimes
tiger top stop it I was getting there okay ngtv were produced for the Italian
market using a two liter index Turbo the main noticeable difference
were the nakaducts which